Jun 16 2026
1) Prep the area (remove glass, old glazing and caulk) 2) Measure and test-fit the new glass 3) Install the new glass pane (with
Learn more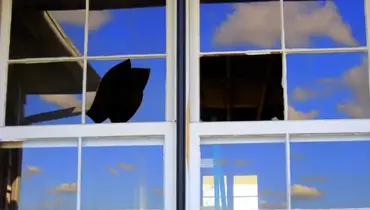
1) Prep the area (remove glass, old glazing and caulk) 2) Measure and test-fit the new glass 3) Install the new glass pane (with
Learn more
Water spots are a nuisance, but often relatively easy to remove. In this article, we will discuss how to remove and prevent water
Learn more
A dirty window screen impedes your view and can even spread dust and allergens throughout your home! Impacted dirt and debris may
Learn more.webp)
Cleaning the shower is an obnoxious but necessary chore if you want the tiles and glass to sparkle. One of the most dreaded aspect
Learn more.webp)
Glass Doctor explains why broken glass in a double-pane window cannot be repaired, only replaced.
Learn more.webp)
Windows Emergency Services Windows
Aug 19 2025If a storm is headed your way, it's wise to think about how to protect your home or business from damage. Whether you live in hu
Learn more.webp)
