Glass Doctor provides a guide on creating a DIY mirror frame.
|
Here at Glass Doctor®, we're nuts about mirrors. Mirrors have always been some of the most important pieces of furniture in the home. But these days, mirrors aren't just functional – they can completely transform the look of a space. So, if the only mirror in your home is above the bathroom sink, you're missing out!
Mirrors can be used as design elements that bring light into a room and make small spaces feel bigger. Keep reading to learn some simple DIY techniques for crafting a beautiful, decorative mirror frame.
DIY Mirror Frame Ideas
Mirrors come in endless variations for every design aesthetic and purpose. You can choose between any of the following frame types:
- Raw wood: Raw, untreated wood is perfect for rustic spaces. Search for reclaimed wood if you want a weathered look.
- Stained wood: Wood frames can be stained to match other wooden elements in your home, such as the floors or molding.
- Painted wood: Paint your wood mirror frames in bright colors, or go understated with black or white paint. To add flare, tape off sections of the frame to create a pattern.
- Metal: Industrial materials like metal are trendy right now. Choose a frame that matches the metal fixtures elsewhere in your home.
- Frameless: The ultimate modern statement, frameless mirrors have the incredible effect of making a room feel larger.
DIY Mirror Frame Instructions
Ready to dress up a plain old mirror in your home with some DIY know-how?
First, gather supplies:
- Gloves
- Safety glasses
- Ruler
- Sandpaper
- Carpenter's square
- Miter saw or hand saw
- Construction adhesive
- Wood molding or other reclaimed wood
- Stain
- Clean rags or brush
- Drop cloth
How to Build a Mirror Frame
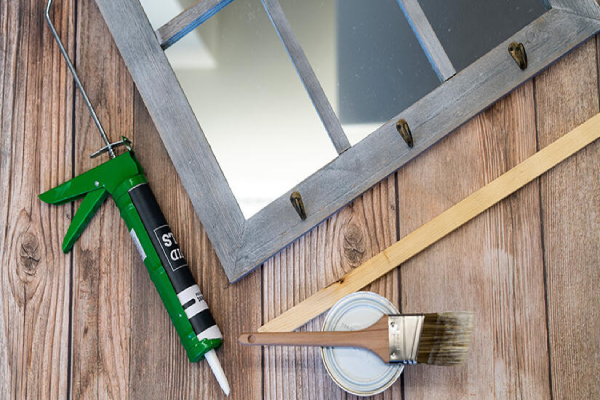
These instructions are for a stained-wood mirror but can be adapted for any type of frame:
- Measure your mirror.
You're going to glue the frame to the edges of the mirror, so make the outside edge of the frame match the outside dimensions of the mirror. - Choose your wood.
You may have some pieces of wood already. If so, make sure they are straight and flat. Otherwise, head to your local hardware store and buy some lengths of wood molding. For a discount option, buy lightly used or reclaimed wood at your local building surplus or thrift store. - Plan corners.
Decide if you want your frame corners to join with 45-degree-angle seams or with molding corner medallions. If you prefer the latter, purchase medallions as well. - Sand.
Wearing gloves and safety glasses, gently sand any rough edges, splinters, and preexisting stains or paint off the wood. - Stain both sides of the wood.
It's important to stain both sides of the wood because, when you glue it to the mirror, the back of the frame will be reflected. Lay your wood on the drop cloth. Swipe your wood stain onto the wood using rags or a brush. Rags may leave a more textured, rustic look, while a brush applies a smoother coat. Let the first side completely dry before flipping the wood over and painting the other side. For an extra-rustic look, use your sandpaper again on the dry stain to distress the finish. - Measure twice, cut once.
Carefully measure your wood, and mark where you want to cut. Cut the wood pieces down to size using your miter saw. If using a hand saw, use your square to ensure exact angles at the corners. - Attach the frame to the mirror.
Squeeze a strip of construction adhesive onto each piece of wood and press it onto the appropriate edge of the mirror, making sure the pieces align correctly in the corners. Select an adhesive color that is close to the color of the frame for a seamless look. Let the adhesive dry and hang your mirror!
Choose Glass Doctor for all Your Mirror Glass Needs
At Glass Doctor, we're here for more than just your window needs. Let our local service experts create custom-cut mirrors for your home. Call or request an appointment online today.