Glass Doctor explains how to seal a window to improve energy efficiency and comfort.
|
Sealing air leaks around your windows and windows frames keeps your home comfortable and energy efficient. There are many different types of weather stripping available, and you can choose an appropriate type based on window construction, window location and the size of the gap that's causing the problem. Once you've found the proper weather stripping, which we'll discuss in this blog, seal a window by doing the following:
- Clean and dry the area.
- Measure the length of the air gap, and trim the weather stripping.
- Apply the weather stripping adhesive-side-down to the area you want to seal.
- Secure it with nails or staples three to four inches apart.
Need a little more direction? Keep reading!
Types of Weather Stripping
- Foam Weather Stripping – Foam weather stripping is versatile and easy to apply. It is sold in a variety of thicknesses and widths for different sizes of gaps. Foam weather stripping works best at the bottom or top of window frames and sashes. Foam isn't as durable as other types of weather stripping, so you might need to replace it more often. Reinforced foam comes on metal or wood strips, which offers more durability than foam alone.
- Felt Weather Stripping – Felt is an inexpensive weather stripping material that must be glued, tacked or stapled into place. Felt is not recommended for use in high-abrasion areas or areas exposed to moisture.
- V-Strip Weather Stripping – Also known as tension seal, vinyl v-strip weather stripping is great for sealing the gaps between window glass and the frame. The strips are held in place by the tension created between the two surfaces.
- Door Sweeps – Door sweeps, also called door shoes, are nailed to the bottom edge of the door. They create a barrier between the door and the sill/threshold.
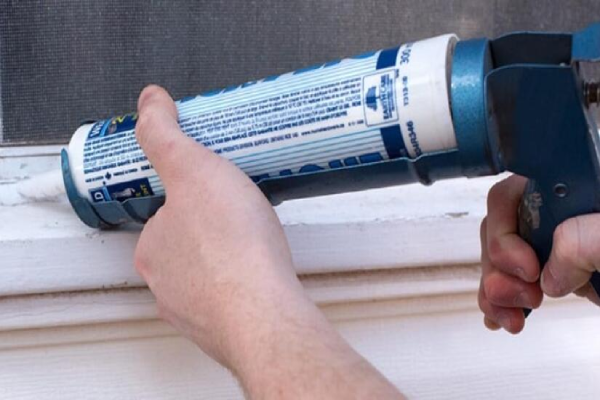
- Caulk – Removable caulk is an effective weather stripping material for weird angles or rough surfaces that need weather sealing. Simply apply where needed and peel off when you want to remove it. This option is not as durable as other weather stripping materials, and some find caulk difficult to remove.
- Metal Strips – Older windows usually have a metal strip tacked to the bottom edge. These can be replaced, or you can re-spring the strips by gently prying them back. These are very durable and effective if maintained, but they're tricky to install. These do not work well on uneven surfaces.
- EPDM Rubber Weather Stripping – This synthetic rubber is a durable weather stripping solution. It comes in many different shapes and sizes. The weather stripping is installed with nails, tacks or adhesive, depending on the location.
- Tubular Rubber & Vinyl Weather Stripping – This weather stripping usually comes with a flange that is either tacked or stapled into place. It can also be friction-fit (no staples required) in modern door frames. This weather stripping is great for weatherproofing around the perimeter of doors.
Storm Windows and Interior Insulator Kits
Storm windows are single panes of glass that are secured to the exterior window frame. Since they don't allow fresh air flow, homeowners install them in the fall and remove them in the spring. This technology is used primarily in older homes. The glass pane creates an extra insulation barrier in your windows and seals out drafts.
Interior insulator kits contain plastic film that is applied to the interior window frame and heat-shrunk to the frame for an airtight seal. While technically not weather stripping, insulator kits and storm windows are very effective, particularly for older homes or single-pane glass windows.
How to Install Weather Stripping
A window or door may need two to three types of weather stripping for the best seal. Always purchase 10 percent more than you think you'll need for the job. If you want an exact replacement, take a small section of the old weather stripping with you to the hardware store.
- Remove old weather stripping and any old adhesive. Use a rag dipped in mineral spirits to dissolve the adhesive if necessary. You may need to use a pry bar or flat head screwdriver to gently pry off old weather stripping that's held with nails or staples.
- Apply weather stripping to the clean, dry surface. If possible, apply one continuous strip. Measure twice and cut once – this helps save material and ensures all the corners meet tightly for a good seal.
- If you're using staples, install them parallel with the weather stripping. Tack or staple the weather stripping down every three to four inches. Weather stripping shouldn't interfere with the operation of the window or door. Find a thickness that compresses tightly between the gap when the door or window is closed and allows easy operation.
Other Weather Stripping Considerations
No matter how much weather stripping you use, if you have gaps between the exterior window trim and your home's siding, you'll still have air leaks. Large gaps can be sealed with expanding foam. Seal smaller exterior gaps between the window trim and house siding with exterior latex caulk. Do the same for the interior trim if you feel cool air seeping in between the window trim and drywall.
Professional Weather Stripping & Window Installation
If you're tired of feeling drafts or watching your heating or cooling costs climb regardless of how much weather stripping you use, Glass Doctor can help. Our local experts can replace your windows with insulated glass units for reliable and efficient performance. Just give us a call, or request a job estimate online.