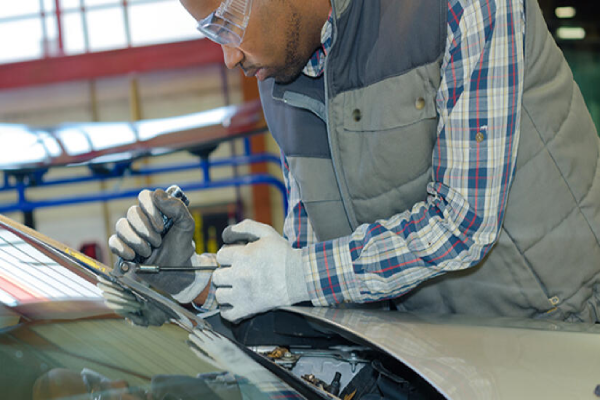
Glass Doctor explains how to replace a cracked windshield safely and efficiently.
|
Your windshield is one of your vehicle's most important safety features. When it becomes cracked or damaged, repair should be a priority. However, if the chip or crack can't be repaired, the windshield must be replaced.
- Remove the rearview mirror, plastic covers, wipers and the rubber gasket.
- Cut the urethane seal with a cold knife.
- Remove the windshield.
- Remove excess urethane with a razor blade and clean the bonding area.
- Apply the urethane primer.
- Run a bead of urethane around the perimeter.
- Reinstall the windshield.
- Allow the urethane to cure.
- Reinstall any hardware you removed and replace the rubber gasket.
Most insurance companies will cover the costs of windshield repair. Ask your insurance company if this service is covered. Many people take their cars to professionals for windshield replacement, yet some want to do it themselves. Windshield replacement is an ambitious DIY project. However, many enjoy the challenge and the satisfaction that comes with completing the job. Below, you'll find step-by-step instructions.
How to Replace a Windshield
Windshield replacement can throw off sensors and cameras that advance driver assistance systems (ADAS) use. If your vehicle uses any ADAS such as: lane departure warnings, blind spot assist or collision avoidance, it's imperative that you have these calibrated by a professional after DIY installation.
Due to the variance between each car manufacturer, it's best to have the service manual for your car. Use the tips below as a guide, along with your service manual, for safe and proper windshield replacement.
Windshield Replacement Tools & Materials
The cost of tools and materials needed to do this project yourself may be more than professional installation. Make sure to do the math and consider your time. Plan to spend about two hours doing this repair yourself.
- Cold knife
- Glass cleaner
- Rubber windshield gasket
- Urethane primer
- Gloves
- Razor blade scraper
- Two suction-cup window holders
- Auto glass urethane
- Stiff nylon brush
- Caulk gun (electric or air powered preferred)
- Vacuum
- Painters tape
- Wire brush/sandpaper
- Hand tools
- Screwdriver
- Pliers
- Utility knife
Begin by sourcing a replacement windshield. Your local Glass Doctor may be able to help you find a replacement. Otherwise, your local car dealer or auto parts store should be able to help you find a replacement. Avoid headaches by purchasing an OEE replacement. Once you've found a replacement, continue with the instructions below:
How to Replace a Windshield in 15 Steps
- Use hand tools to remove the rearview mirror and any hardware attached to the old windshield.
- Remove the wiper blades, windshield gasket and plastic molding around the windshield perimeter.
- Separate the windshield from the pinch weld with a cold knife or razor.
- Use a cold knife to cut the urethane seal around the perimeter of the windshield.
- Remove the old windshield. Be careful not to damage the paint or bonding surface.
Now you should have an empty windshield frame. Use a razor blade scraper to remove as much of the old urethane as possible. Be careful not to scratch the paint or the bonding surface. Don't worry if you can't remove all the old urethane, a thin layer helps the new urethane form a stronger bond. Remove any rust spots with sandpaper or a wire brush to prevent it from spreading. Clean up the bonding surface with a stiff nylon brush to remove any loose particles. Vacuum any debris around the area and clean up your work area before continuing. - Use glass cleaner to clean the new windshield perimeter where the urethane will contact it.
- Apply a urethane primer to the old urethane and perimeter of the windshield.
- Not all urethanes require this step, so be sure to follow the instructions specific for your product.
- Lay a continuous and even bead of urethane around the perimeter of the windshield frame.
- An electric or air powered caulk gun makes this job a lot easier. If you only have a hand powered caulk gun, place the urethane in a bowl of warm water for one hour before applying.
- Fill any gaps in the urethane bead before you continue.
- Install the windshield as soon as possible to prevent the urethane from curing before installation.
- Use suction cup window holders to lower the new windshield into place, ask a friend to help.
- Position the windshield in the correct spot.
- Use tape to hold the windshield in place and prevent it from sliding around while the urethane cures.
- Allow the urethane to cure for the allotted time specified by the manufacturer.
- Reinstall the windshield wipers, gasket, plastic molding, rearview mirror and any hardware you removed.
- If necessary, take the car to a dealer to have the ADAS calibrated.
Professional Windshield Replacement
Replacing a windshield will take you a couple hours. If the value of your time and cost of the tools is more than you want to invest, Glass Doctor can help. You don't even have to go anywhere! We'll bring our windshield replacement services right to you. Our experts will install your windshield so you can get back on the road within an hour. If windshield replacement is covered by your insurance, you'll need to pay the deductible.
All windshield replacements carry our Windshield Protection Plan. This means we'll repair cracks or chips within 12 months for free. If the windshield can't be repaired, we'll replace it and won't charge you the cost of the glass. Just call, or schedule an appointment online.

