Glass Doctor explains how to install a replacement window with these key steps.
|
› Decide if you can just replace the glass.
› Remove the old window.
› Prep the opening: Ensure squareness; leave a quarter-inch space around entire window.
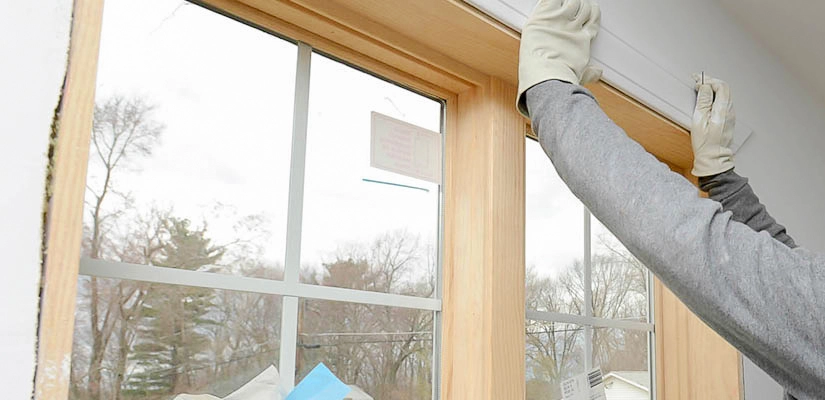
› Install the window with a bead of silicone; make it level with shims before securing.
› Apply house wrap or flashing tape.
› Apply foam insulation, jamb extensions and trim.
Some homeowners choose to replace windows to achieve better energy efficiency or to upgrade aging units. Others want new windows for a specific look. Before we go into detail, here are the basic steps:
Before You Begin
There are so many different types of windows and installation techniques. Glass Doctor recommends using these instructions as a framework and adjusting as needed – if you're working on an older home, on a new construction, or with an atypical modern window frame, the process will require different techniques.
This guide is most useful for those who are replacing old double-hung windows with modern double-hung units. Consult the new-window manufacturer's instructions for any specific installation techniques before you proceed. Incorrect installation can lead to drafty windows, high energy bills or even costly repairs.
The Cost of DIY vs. Professional Installation
Sometimes the cost of the tools for a DIY job can outweigh the savings on labor, especially if you factor in your time. Ask yourself if the cost of professional installation is worth peace of mind and more free time. If you've decided you want to learn a new skill and invest some sweat equity in your home, you've come to the right place!
What Do I Need to Install a Window?
Remember: If you buy cheap, you'll buy twice. If you're replacing all the windows in your home, the upfront investment in good tools will pay off. If you're just replacing a few windows, you may be able to get away with inexpensive tools or even rented tools. The following list is meant to be a guide. Tool or material requirements will depend on the complexity of the installation.
Tools
- Level
- Drill
- Pry bar
- Circular saw
- Table saw
- Miter saw
- Finish nailer
- Air compressor
- Caulk gun
- Utility knife
Materials
- New window
- Trim molding
- Paint
- Finish nails
- Shims
- Caulk
- Foam insulation
- Hammer
- Flashing tape
- House wrap tape
How to Install a Window
1) Avoid Common Problems – Make sure the wood around the window opening is not rotten. Check that it's square and that you've measured the dimensions accurately. To exactly measure the size of the old window, remove interior trim before measuring. Source a replacement with identical dimensions and sound structure.
Can't find the right window size at your local hardware? The best course of action is to keep looking for the right size or order an appropriate replacement. But if you're in a rush, it's better to get a smaller window than a bigger window. If you go this route, plan to spend extra time on resizing the window opening.
2) Prep the Area – Once you've gathered all the tools and materials, prep the area. This project will kick up dust and debris. You may want to remove or cover furniture, as well as lay down tarps on the floor. If there is a return air duct in the room, cover it with plastic or turn your HVAC system off.
3) Remove the Old Window – Use a hammer and pry bar to gently pry off the interior and exterior window trim, sill plate and window casing. Be careful not to crack the trim if you'll be reusing it. Remove any hardware that is holding the window in place – usually a set of screws or nails around the interior perimeter and exterior window flange. Older windows may have caulk or paint in the seams. Use a razor knife to break these seams, and slowly work your pry bar around the perimeter. A putty knife is also helpful to loosen tight seams. Once the window is loose, carefully remove it and set it aside.
4) Prep the Window Opening – Once the window is removed, you should be left with horizontal headers and vertical studs (the window opening). Make sure these surfaces are plumb and square. If you need to compensate for crooked headers or a replacement window that isn't the right size, you may have to add new boards that you cut lengthwise with a table saw. Leave a quarter-inch gap on all sides between the new window and the window opening, which allows for final adjustments. Peel back any house wrap so the window frame can be installed on wood. You'll use the house wrap later for weatherproofing.
5) Window Installation – Dry-fit the window to ensure it is a snug fit. Apply a generous bead of silicone around the perimeter of the exterior window opening, where the new window flange meets the exterior siding. Insert the new window, and use shims and a level to adjust the window frame in the opening. Once the window is plumb and level, use screws according to manufacturer instructions to anchor the window in place.
The next steps are important to ensure a weather-tight seal. For the best seal, remove more house siding around the perimeter of the window so you can apply flashing tape on the house and window. Unfortunately, if you're replacing existing windows, this can be a difficult job.
Follow the manufacturer's suggestions for specific techniques / products to cover gaps and get a good seal. Otherwise, follow these directions: Use flashing tape or house wrap to cover the gaps where the new window frame flanges meet the window opening. Ensure the wrap / tape overlaps all seams and edges and is applied flush with the window frame and the exterior siding. Cover any cuts in the house wrap with house wrap tape.
Insulate & Finish – Use foam insulation to fill air gaps between the new window frame and the window opening. Allow it to dry while you clean up the installation area. Organize the area, put away tools and use a shop vacuum to remove any sawdust or debris. Trim away the excess foam once it has dried. Install the jamb extensions and interior trim molding with a trim nailer. Replace exterior molding with nails or screws. Finish the project by filling nail holes with wood putty and painting or staining if needed.
Replace the Glass, Not the Window
If the window frame is still in good condition, some homeowners may be able to get away with simply replacing the window glass. If the only issue is leaking insulated glass, glass replacement can be a good solution that is cheaper and easier than a full unit replacement. Glass Doctor can help with window glass replacement, giving you more time for family or other projects around the house. Call or schedule an appointment online for expert advice and service from professionals who care.